

Node JS & Mongo-DB
- Rakesh Kumar

- Jan 23, 2019
- 5 min read
Updated: Feb 1, 2019

Installing MongoDB on a Mac
What’s MongoDB?
MongoDB is a document database which belongs to a family of databases called NoSQL - not only SQL. In MongoDB, records are documents which behave a lot like JSON objects in JavaScript. Values in documents can be looked up by their field’s key. Documents can have some fields/keys and not others, which makes Mongo extremely flexible.
This is different than SQL databases like MySQL and PostgreSQL, where fields correspond to columns in a table and individual records correspond to rows.
Prerequisites
You should have some familiarity with the Mac Terminal application since you’ll need to use it to install and run MongoDB.Dependencies. This guide goes over the two main ways to install MongoDB on a Mac. One of the methods requires Homebrew.Homebrew. Homebrew is a package manager for the Mac – it makes installing most open source software (like MongoDB) as simple as writing brew install mongodb. Follow the instructions in the How to Install Homebrew on a Mac instruction guide.
Installation Overview
There are two primary ways to install MongoDB on a Mac. The best way to install MongoDB is with Homebrew. The other way to install MongoDB is by downloading it from the the MongoDB website.
Install and Run MongoDB with Homebrew
Open the Terminal app and type brew update.After updating Homebrew brew install mongodb After downloading Mongo, create the “db” directory. This is where the Mongo data files will live. You can create the directory in the default location by running mkdir -p /data/db
Make sure that the /data/db directory has the right permissions by running
> sudo chown -R `id -un` /data/db
> # Enter your password
Run the Mongo daemon, in one of your terminal windows run mongod. This should start the Mongo server.Run the Mongo shell, with the Mongo daemon running in one terminal, type mongo in another terminal window. This will run the Mongo shell which is an application to access data in MongoDB.To exit the Mongo shell run quit()To stop the Mongo daemon hit ctrl-c
Working with MongoDB
Visual Studio Code has great support for working with MongoDB databases. Through the Azure CosmosDB extension, you can create, manage and query MongoDB databases from within VS Code.
Install the extension
MongoDB support for VS Code is provided by the Azure Cosmos DB extension. To install the Cosmos DB extension, open the Extensions view by pressing ⇧⌘X and search for 'cosmos' to filter the results. Select the Microsoft Azure Cosmos DB extension.

Connect to MongoDB
Once you've installed the Cosmos DB extension and reloaded VS Code, you'll notice there is a new AzureActivity Bar view. Click on the Azure view and you'll see the Cosmos DB Explorer.
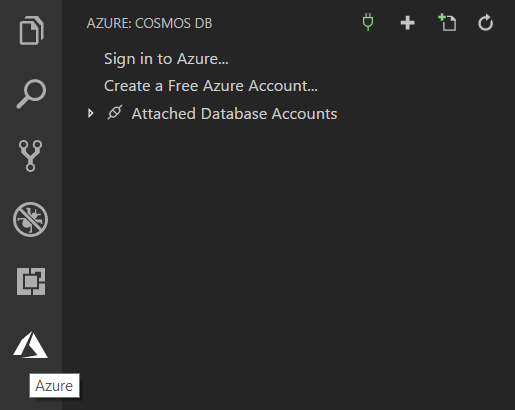
To connect to a MongoDB database, expand the Attached Database Accounts and click Attach Database Account, and choose the MongoDB from the Database Account API drop-down list.

Enter a connection string to the database, the default is your local MongoDB server at mongodb://127.0.0.1:27017. You can enter any connection string, to local or remote MongoDB servers.
Note: Make sure your MongoDB server is running if you are connecting to a local MongoDB server.
Once attached, you can work with the MongoDB server, managing MongoDB Databases, Collections and Documents.

You can Open Collection to see the raw JSON Collection or click on individual MongoDB Documents to see just their JSON.

Changes to the Document JSON in the editor will update the Document stored in the Collection. You will see a notification to Upload the entity update. To silence the notification, you can choose to Always upload, which modifies the cosmosDB.showSavePrompt setting value to false.
MongoDB Commands
There are MongoDB specific commands available in the VS Code Command Palette (⇧⌘P) as well as through Explorer context menus.

Using Scrapbooks
One of the most powerful features of the VS Code MongoDB integration is Mongo Scrapbooks. Scrapbooks let you create, run, and save MongoDB commands from a VS Code editor. Create a new scrapbook from the Cosmos DB Explorer or with the Cosmos DB: New Mongo Scrapbook command.

In a scrapbook, you can reference MongoDB entities and commands and you get rich IntelliSense as you type. At the top of the editor and above each line, you will find commands to manage connections and execute your commands. Scrapbooks are extremely useful for saving database operations and queries for later reuse.

For More Details:
https://docs.mongodb.com/manual/introduction/
To do CRUD operations on MongoDB using NodeJS here you go:
https://www.w3schools.com/nodejs/nodejs_mongodb_find.asp
Node.js tutorial in Visual Studio Code:
Node.js is a platform for building fast and scalable server applications using JavaScript. Node.js is the runtime and npm is the Package Manager for Node.js modules.
Visual Studio Code has support for the JavaScript and TypeScript languages out-of-the-box as well as Node.js debugging. However, to run a Node.js application, you will need to install the Node.js runtime on your machine.
To get started in this walkthrough, install Node.js for your platform. The Node Package Manager is included in the Node.js distribution. You'll need to open a new terminal (command prompt) for the nodeand npm command line tools to be on your PATH.
Linux: There are specific Node.js packages available for the various flavors of Linux. See Installing Node.js via package manager to find the Node.js package and installation instructions tailored to your version of Linux.
Tip: To test that you've got Node.js correctly installed on your computer, open a new terminal and type node --help and you should see the usage documentation.
Hello World
Let's get started by creating the simplest Node.js application, "Hello World".
Create an empty folder called "hello", navigate into and open VS Code:
mkdir hello
cd hello
code .
Tip: You can open files or folders directly from the command line. The period '.' refers to the current folder, therefore VS Code will start and open the Hello folder.
From the File Explorer tool bar, press the New File button:

and name the file app.js:

By using the .js file extension, VS Code interprets this file as JavaScript and will evaluate the contents with the JavaScript language service. Refer to the VS Code JavaScript language topic to learn more about JavaScript support.
Create a simple string variable in app.js and send the contents of the string to the console:
var msg = 'Hello World';
console.log(msg);
Note that when you typed console. IntelliSense on the console object was automatically presented to you.

Also notice that VS Code knows that msg is a string based on the initialization to 'Hello World'. If you type msg. you'll see IntelliSense showing all of the string functions available on msg.

After experimenting with IntelliSense, revert any extra changes from the source code example above and save the file (⌘S).
Running Hello World
It's simple to run app.js with Node.js. From a terminal, just type:
node app.js
You should see "Hello World" output to the terminal and then Node.js returns.
Integrated Terminal
VS Code has an integrated terminal which you can use to run shell commands. You can run Node.js directly from there and avoid switching out of VS Code while running command line tools.
View > Terminal (⌃` with the backtick character) will open the integrated terminal and you can run node app.js there:

For this walkthrough, you can use either an external terminal or the VS Code integrated terminal for running the command line tools.
Debugging Hello World
As mentioned in the introduction, VS Code ships with a debugger for Node.js applications. Let's try debugging our simple Hello World application.
To set a breakpoint in app.js, put the editor cursor on the first line and press F9 or click in the editor left gutter next to the line numbers. A red circle will appear in the gutter.

To start debugging, select the Debug View in the Activity Bar:
You can now click Debug tool bar green arrow or press F5 to launch and debug "Hello World". Your breakpoint will be hit and you can view and step through the simple application. Notice that VS Code displays a different colored Status Bar to indicate it is in Debug mode and the DEBUG CONSOLE is displayed.

Now that you've seen VS Code in action with "Hello World", the next section shows using VS Code with a full-stack Node.js web app.
So now you have learned beginner level... for more lets go to next blog here:
In Brief Help Info:
Kill Process
$ pgrep mongo
$ kill PID
start Mongo demon:
mongod
start mongoldb
mongo
Start node server:
nodemon start or node start


Comments